Installing a garage door isn’t just another weekend project. It’s a job that requires precision.
One misstep, and you could end up with a crooked door or a dangerous spring mishap. But with the right tools and a clear plan, it’s absolutely doable.
We’ll break it all down, so you can tackle the job confidently and get a smooth, reliable door that works perfectly.
Let’s get started.
Key Notes
- Installation requires specific safety gear and tools – assemble everything from safety glasses to sawhorses beforehand.
- Proper track alignment and spring installation are the most technically challenging and dangerous steps.
- Most modern garage doors come in sections that must be assembled in sequence from bottom up.
1. Safety First—This Isn’t a Job to Rush
Garage doors are heavy, and the springs that help lift them store a lot of tension.
If handled incorrectly, they can snap with dangerous force. That’s why safety should be your top priority.
Gear Up for Protection
- Safety glasses: Keep dust and debris out of your eyes.
- Heavy-duty gloves: Protect your hands from sharp edges and pinches.
- A sturdy ladder: You’ll need one to reach the tracks and opener.
- Clamps: Essential for keeping the door steady during installation.
- A second pair of hands: Garage doors are awkward to lift alone.
ℹ️ If you’re replacing an old door, disconnect the power to the opener before you start. And if your door has torsion springs, be extra cautious—releasing them incorrectly can be dangerous.
2. Gather Your Tools and Materials
Having everything ready before you start will make the installation process much smoother.
Tools You’ll Need:
- Power drill with various bits
- Socket wrench set
- Level
- Tape measure
- Locking pliers or C-clamps
- Sawhorses (to hold panels while assembling)
Materials for Installation:
- New garage door and all included hardware
- Tracks to guide the door
- Springs (torsion or extension, depending on your setup)
- Hinges, rollers, and brackets
- Weatherstripping to keep out drafts
Double-check your manufacturer’s guide to ensure you have all the necessary parts.
3. Removing the Old Garage Door
Before installing the new door, you’ll need to take down the old one. This part requires care—especially if you’re dealing with torsion springs, which are under high tension.
How to Remove It Safely:
- Release the spring tension. Use winding bars to carefully unwind torsion springs. If your door has extension springs, detach them from the track.
- Disconnect the opener. Unplug it and remove the arm that connects it to the door.
- Remove the door panels. Start at the top and work your way down, carefully unscrewing the hinges.
- Take down the tracks. Once the door panels are gone, remove the vertical and horizontal tracks.
Lay the old panels flat and keep small parts organized—you might need them as a reference for installing the new door.
4. Prepping the Installation Site
Before bringing in the new door, make sure your garage is ready for it.
- Measure the opening. Compare it to the dimensions of your new door to ensure a proper fit.
- Inspect the framing. Look for any damaged wood or weak areas and replace them if necessary.
- Clean the space. Clear out tools, debris, or anything that could get in the way.
If your garage floor is uneven, use shims when installing the bottom panel to keep everything level.
5. Assembling the Garage Door Panels
Most modern garage doors come in sections that need to be put together before installation.
Step-by-Step Assembly:
- Lay out the bottom panel in the doorway, making sure it’s level.
- Attach hinges and brackets to the panel according to the manufacturer’s instructions.
- Insert rollers into the side brackets—this makes it easier to connect the door to the tracks later.
- Stack the remaining panels one at a time, connecting them with hinges as you go.
Make sure everything stays straight and aligned. If one section is off, it will cause problems when the door moves.
6. Installing the Door Panels in the Opening
Now it’s time to secure the panels in place.
How to Do It Right:
- Position the bottom panel in the opening and use temporary nails or clamps to keep it steady.
- Stack the next panel on top, aligning it carefully before screwing in the hinges.
- Continue adding panels until the entire door is assembled.
- Attach the side brackets that hold the rollers in place within the tracks.
Make small adjustments as needed to ensure the panels are level and flush.
7. Installing the Tracks
The tracks guide the door’s movement, so they must be installed precisely.
Steps for Proper Alignment:
- Attach the vertical tracks to the wall, making sure they’re perfectly straight.
- Install the curved track sections that transition into the horizontal tracks.
- Secure the horizontal tracks to the ceiling, ensuring they’re parallel.
- Double-check the alignment before tightening everything.
If the tracks aren’t level, the door might get stuck or wear unevenly over time.

8. Setting Up the Spring System
Garage doors use either torsion springs (mounted above the door) or extension springs (installed on the sides). These help counterbalance the door’s weight, making it easy to lift.
Installing Torsion Springs:
- Mount the torsion bar above the door.
- Slide the springs onto the bar and secure them with brackets.
- Use winding bars to tighten the springs to the correct tension.
Installing Extension Springs:
- Attach the springs to the rear brackets of the horizontal track.
- Hook up the safety cables to prevent accidents if the spring snaps.
- Adjust the tension until the door moves smoothly.
Spring installation is one of the most dangerous steps, so take your time and follow the manufacturer’s instructions carefully.
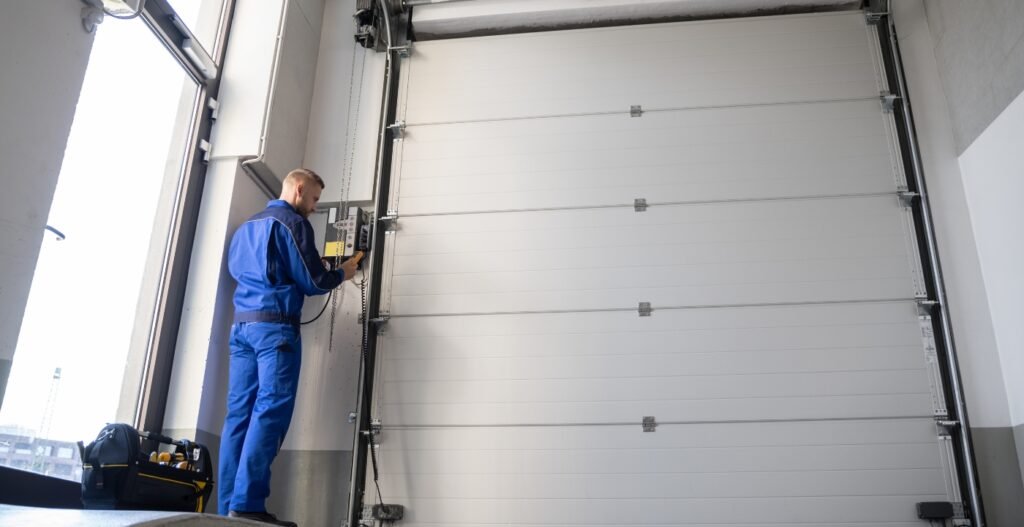
9. Attaching the Garage Door Opener (Optional)
If your door will be motorized, now’s the time to install the opener.
How to Set It Up:
- Mount the opener unit to the ceiling using sturdy brackets.
- Connect the opener rail to the door.
- Install the safety sensors near the bottom of the tracks.
- Test the opener to ensure the door moves smoothly and reverses when obstructed.
Adjust the force and travel settings as needed so the door opens and closes correctly.
10. Final Checks and Testing
Now for the moment of truth—testing your work.
What to Look For:
- The door should open and close smoothly without sticking.
- It should stay in place when partially open (a sign the springs are balanced).
- The tracks should be straight and secured tightly.
- If using an opener, the safety reverse feature should work properly.
Lubricate the hinges, rollers, and springs to reduce friction and noise. If anything feels off, make adjustments before using the door regularly.
Struggling With Heavy Lifting & Tricky Springs?
Frequently Asked Questions
How long does it take to install a garage door?
For an experienced DIYer, installation takes about 4–6 hours. If it’s your first time, expect a full day.
Can I reuse my old tracks with a new garage door?
It’s not recommended. Tracks are designed to fit specific doors, and mismatched parts can cause alignment issues.
What’s the best way to maintain a newly installed garage door?
Lubricate moving parts every six months, check spring tension, and inspect tracks for debris or wear.
Do I need insulation for my garage door?
If your garage is attached to your home or used as a workspace, insulation helps regulate temperature and reduce noise.
How do I know if my garage door springs are balanced correctly?
Open the door halfway manually—if it stays in place without falling or rising, the springs are balanced.
Can I install a garage door alone, or do I need help?
It’s possible, but having a second person makes handling heavy panels and springs much safer.
Conclusion
Installing a garage door takes patience, precision, and the right tools. From prepping the space to setting up tracks and springs, every step matters.
A properly installed door operates smoothly, keeps your garage secure, and lasts for years with minimal maintenance. If you’re confident in your skills, this guide will help you get the job done.
But if you’d rather skip the heavy lifting and guarantee a flawless installation, let our experts handle it.
Get a free quote today and enjoy a hassle-free garage door setup.